Pages

Saturday, June 30, 2012

We're Cruisin! Paper Trail Blog Hop)

Welcome to this month's Paper Trail Blog Hop! If you're Cruisin' along (wink, wink) you've probably arrived here from Linda's blog. If this is your first stop, don't worry - this hop is circular. Either way we're glad you could join us! This month we are featuring the Cruisin' paper pack.

Here is the layout I created using this fun paper:
I chose to document a sad memory - the closing of one of my hubby's favorite hang outs.

I liked the subtle effect of the patterns just peeking out. (Although I really wanted to use the scrabble and map paper, they just didn't seem to work here.)

I left space for him to journal on the light pattern about what he liked about Clark's. (More likely, I will ask him questions and then record what he says.)


In addition to the Cruisin' papers, I used the coordinating Bottle Caps which were perfect in theme and sentiment for this layout.


I also created a stamped border on the background card stock using my new favorite stamps set - Super Powers.
This skyline stamp caught my eye when the idea book first came out, but I held off since I wasn't sure how often I would use it, or if I would use the other stamps in the set. I was so pleased with the effect on this layout that I think we will all be seeing more of this stamp!

I'm glad you stopped by! Please leave me a comment to let me know what you think before you cruise on along to Mary's blog to see what she created.

Saturday, June 23, 2012

What to do with too many photos


I'll confess right now, I'm not a great photographer. To make up for that, I take a ton of photos. Many I delete before I print, but sometimes I still sit down to create a layout and have to weed through a pile of 15-20 photos. Sound familiar?

With any pile of photos, there are many stories you could tell.
  • The story of the action in the pictures
  • The story leading up to the action in the pictures
  • Your feelings about the action
  • Another person's feelings about the action
  • How these photos are part of a tradition or a break from it
  • How these photos show a personality or relationship
The list could go on. You could tell any of these stories about one photo (much less a pile of 15). So how do you deal with that pile? I start out by spreading them out on my workspace.


Usually a few photos really catch my attention either because of the photo itself or because of the way it captures the moment. I look for the story I want to tell with these photos and save the rest for later.
In this set, a few things stood out to me:
  • a photo of my daughter wrapped in a towel - this will be a story about her personality and what she was like that summer
  • a series of 3 or 4 of my son pouring water - another personality layout
  • a few (3 or 4) of my kids playing together in the pool - this will be about the action in the photos - the pool, the summer heat, the two playing
This breakdown made my pile seem much more manageable. Now I wasn't dealing with 15 photos of one event. I was dealing with three different stories and the photos that went along with them. Each story by itself was very manageable - just a few photos, one layout.

I put aside the photos that didn't fit with any of these stories (like the ones of my feet in the pool.) I may come back to these photos later and find another story I want to tell. Then I created the layout 
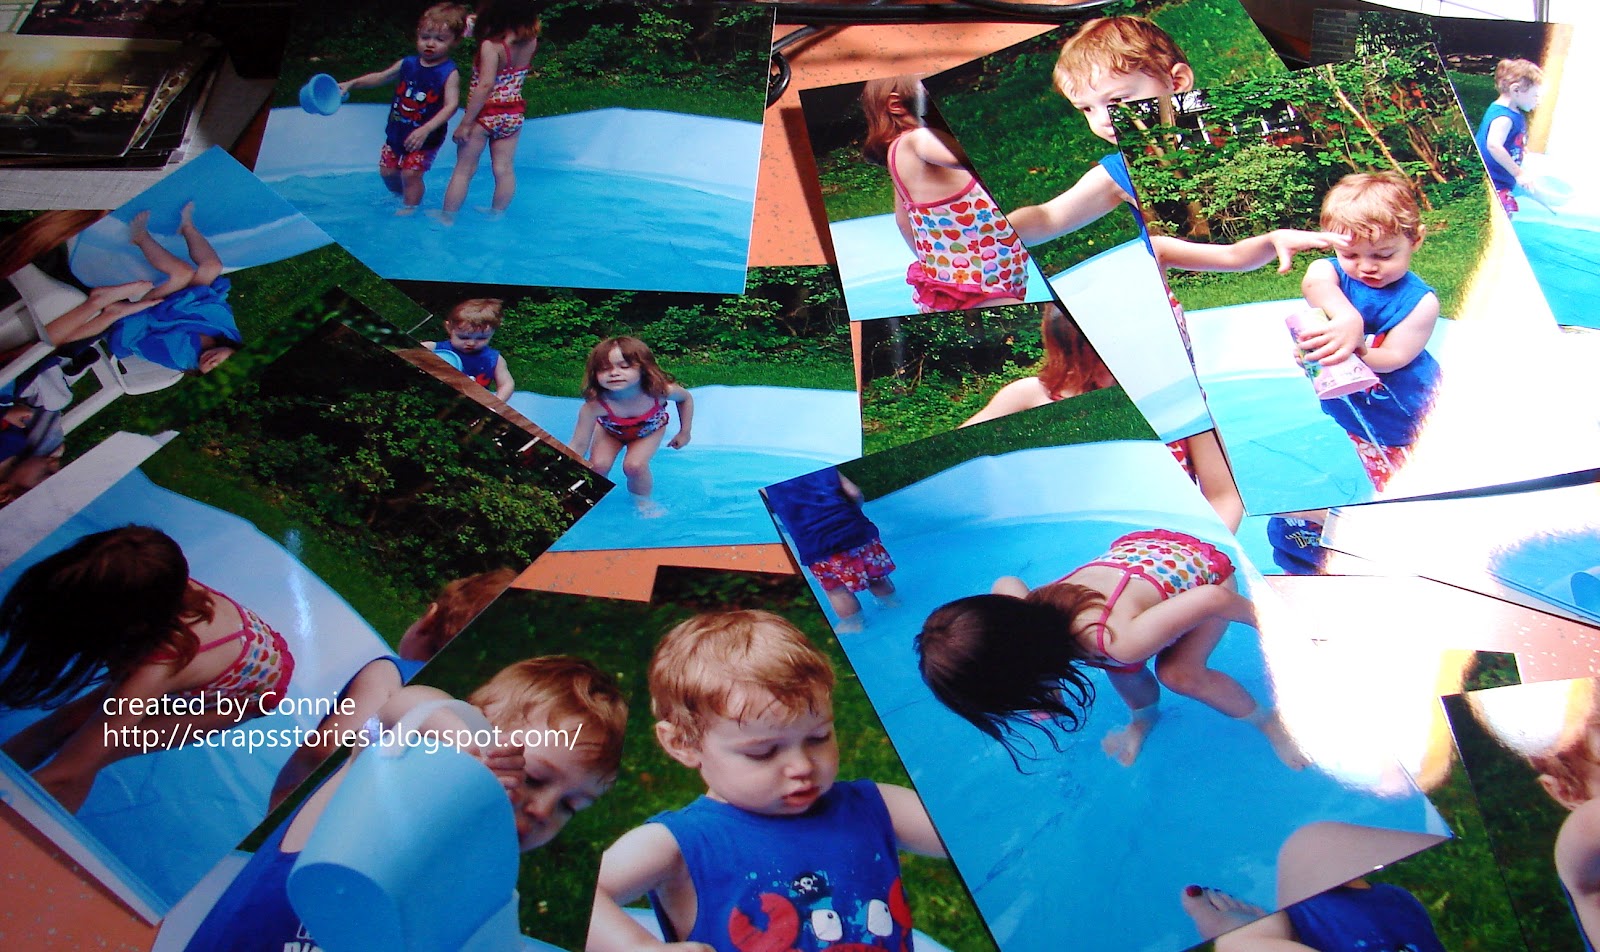
about the kids playing in the pool. Here's a sneak preview:

Check back next month for the full reveal!
Next time I sit down to create, I'll be ready to work on one of the others. If you are saving photos for another scrapping session, I suggest you separate and label your groups of photos. It is frustrating to find the pile of 15 all bunched together again and not remember the decisions you've made. (Yes, I am speaking from experience.)

This story approach is only one way to deal with the pile of 15 photos. You could also create an interactive page, print the photos in a collage, create a mini book, but those are topics for another day!

Sunday, June 10, 2012

June class is Superhero!


My June class uses the Superhero paper pack from Close to My Heart. Check out the classes page for more information. There are still seats available for June 25!

Thursday, June 7, 2012

Project #2 - Name Banner

I've been working away on my projects but not posting because many are gifts. I want to be sure that the recipients see the gifts first in real life not here in photos. My darling niece has received her banner, so now I can share it here.


The chipboard banner is from CTMH, and I used the Art Philosophy Cricut Cartridge to cut the paper into the appropriate shapes. The Cricut cut pieces matched perfectly with the banner and made my job much easier. I chose the paper I did because my niece's room is decorated in pinks and browns. This paper is More to Adore - long retired from CTMH. It is actually the first I bought from CTMH in 2007.


I cut each of the letters of Abby's name from patterned card stock and then adhered them with foam dots to the banner pieces.


I alternated between three types of embellishments - Chocolate twine, buttons and Opaques Mocha.


Since Abriella only has 8 letters, I chose to decorate the remaining two pieces to use as anchors at the end. Again, I used Cricut cut shapes and the same embellishments.


I added the cute little bird specifically because I know that Abby's mama likes them!

I'm pretty happy with the way this project turned out.  I hope Abby enjoys it as well! This is also a perfect entry for The Paper Variety's current challenge - Anything but (a card or a layout.)

Two projects down, only 34 more to go!

Monday, June 4, 2012

My One Little Word

This is a post that has been five months in the making. I chose my one little word in January (along with many other people). I even started this layout in January, but life and my scrappy process intervened (see my post about finishing things up.) Still, this word has been on my heart and in my head this year and finally, it is also in my album!


I'm proud that I finally finished this layout. It had been in progress so long it would have been easy to give up on it. I'm glad I chose to finish, because I had fun playing with different effects on different portions of this layout. I used mist, background stamps, sponges, handwriting,  and second generation stamping.


 I thought of each tag on the right hand page as a separate small canvas. The three text heavy tags ended up looking very similar. It was fun to balance their similarity with the other three.


Did you notice there is no patterned paper on this layout?


Do you have a word for this year? If so, what is it and how is it going?