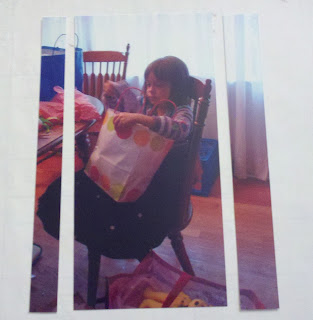
and I confessed that I was nervous to try this pattern from the Make it From Your Heart book because of the five cropped photos. I am not skittish about cropping my photos, but I was nervous about this pattern for two reasons. First, the images looked small. I wasn't sure I would be able to crop my 4X6 photos and still keep enough of the image to tell a story. Second, this pattern doesn't allow for changing the sizes of the photos without some other changes that I didn't want to calculate.
I had many photos of my daughter opening gifts on this birthday so I decided to brave it. If it didn't work, I could always use other photos from the same day.
I am not a person who measures everything to a T. In fact, I often "measure" based on photo and paper sizes and mark mostly with my fingernails. Here is my non-scientific, minimal measuring way to crop photos to this size.
 |
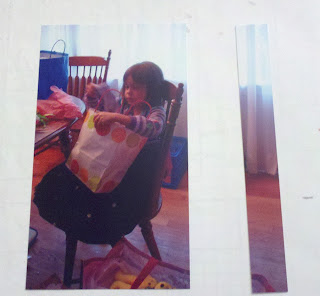
Here is my original 4X6 photo. My daughter opening the gift is the focal point, but there are may extraneous details in the image - especially on the right side.
To make this photo fit in the pattern I need to take off 2 inches from one dimension and 1 1/2 inches from the other.

When cropping to a specific size, I start with the side with the most "extra" space - in this photo the right hand side. I crop off whatever I think is the extra space without getting too close to my focal image. I can always come back and trim more closely later.
Here is my photo after my first cut. I have preserved the image of my daughter and she is now centered on the photo.
 Next, I turned the photo in my trimmer and cropped off as much as I was willing to from the opposite side. Notice, so far there has been no measuring! I have been using the photo image as my guide.
 After making these two cuts, I measured my photo and realized that I needed to trim a bit more so that it would fit the pattern. I decided I could take a bit more off of the right side of the photo more easily than the left. I measured the 2 1/2 inches and trimmed.
I followed the same process for the vertical dimensions of the photo. I started by trimming off the bottom with the chair legs and the bag. Then I measured and trimmed the photo to 4 inches.
 And here it is. The final cropped photo. The photo now fits in the pattern. Also, because I cropped it to this size, there is nothing to distract from the focal point - my daughter and her gift.
Are you timid about cropping? Try it - I think you may like the results! Do you have other tricks to make cropping easier? I would love to hear them - especially if they don't involve much measuring.


No comments:
Post a Comment