Pages

Tuesday, April 29, 2014

Reading Changed My Life

This layout was inspired by the April challenge over at Once Upon a Sketch. (Yes, I am getting this in under the wire.)

Here is the sketch:


And here is my take on it:


I loved the sketch and the journaling challenge was the perfect starting point for what I wanted to say about these photos. Reading did change my life - and it continues to change it. Watching my daughter read with her grandpa also changed my life.


I liked the busy band across the middle of the layout and the restful white space above and below. I used buttons, ribbon, stamping, chipboard and brads to embellish around the photos.


Because my title was a long one, I moved the journaling onto the white space below the photos. This helped balance the title and made it easy to ready my story.


Thanks for the challenge! It was a fun layout to create!

Sunday, April 27, 2014

Play

My school spring break is just finishing up. I took some time to play this week and one thing I created was a layout based on sketch challenge at Scrapping Everyday Miracles this month. Here is the sketch:


And here is my layout, called Play:


I chose to use two very similar photos instead of just one to show more of what all three kids were doing as they played.


I used a playful font for my stamped title, and embellished with velvet-textured rub ons.


I really liked that the journaling wrapped around the circular element in the sketch. I added a journaling block but kept the wrap-around feeling with the punch out.


Thanks for the challenge! It was fun to play with!

Friday, April 18, 2014

Letting the photos tell the story


I create pages to tell stories. Sometimes the story comes through in the journaling, but sometimes the photos do a good job of speaking for themselves. In those instances, I work to keep my products and design from getting in the way!

I captured these moments on a weekend getaway for a friend's wedding. Once I had the photos arranged to showcase the beautiful location, I didn't want my design to distract from that. I decided to go with simple products: some green B&T paper from the Ivy Lane pack, Gold Polka Dot Washi tape, one fussy cut flower and a bit of subtle stamping.


The stamps I used were from a variety of sets. All similar size and all sentiments that fit with the story although the styles are very different. This fit well with my style of using words as embellishments. 


Fussy cutting is not usually one of my favorite techniques, but this flower was perfect for it! It is from the other side of the paper I used as my photo mats.


What about you? What are your tricks for emphasizing photos on your layouts?

Tuesday, April 1, 2014

Ariana on the Paper Trail!

Welcome to this stop on the Paper Trail Blog Hop! You've likely arrived here from Inky Fingers, Karen's blog.  If not, never fear. As always, our hop is circular so you can start anywhere! 

I love the Ariana paper pack! The patterns are elegant and include my favorite color ever: Outdoor Denim. True confession, Outdoor Denim is one of the few ink pads I have worn out past the point of re-inking. I

This elegant floral paper was perfect to record an elegant birthday celebration. Ariana features kit exclusive colors Ariana Coral, Ariana Green and Ariana Grey. I didn't have enough Ariana Coral for my design, so I went into my stash to see what I could find. I came up with Blush cardstock which worked well for my project. Here is how my two page layout turned out.

The left page:


The right page:
 

I used the stamp set from the Ariana Workshop on the Go to create these flower embellishments using the rock and roll technique. Since I had used Blush cardstock, I used that as a base for my stamping and rock and rolled with Hollyhock.    

Workshops on the Go are a good bargain and they come with products that already coordinate perfectly including an exclusive stamp set!    


I also used a new favorite stamp - Banner Wishes - to create the title for my page.  A few sparkles including one small flourish add some elegant details.


I decorated the edge of the Outdoor Denim cardstock using the Scallop Border Punch. The border is a strip of Blush cardstock embellished with another sentiment from Banner Wishes.


Thanks for stopping by! I hope elegant Ariana has inspired you. Please leave me a comment and let me know what you think before you continue on the Paper Trail to Mary's blog, The Road to Peace of Mind or Escape?

Saturday, March 1, 2014

Today - on the Paper Trail with Skylark

Welcome to this stop on the Paper Trail Blog Hop! You've likely arrived here from The Happy Scrapbooker, Diane's blog. If not, never fear. As always, our hop is circular so you can start anywhere! 

The colors of Skylark had me ooing and ahhing from the get go. The combination of Lagoon and Kraft was perfect!

I'm still working on Easter photos from a few years ago. (You can see others in last month's hop!) Fortunately for me,  my kids' Easter outfits from that year coordinate perfectly with this paper!

I created two coordinating pages. This one features my two kiddos.


The chipboard complements provided a perfect title and accents. I added just a bit of bling.


This second page features my two and one of their beautiful cousins. 


Again, I accented with chipboard complements and some bling.


 The "Picture Perfect" accent hung over the edge of the page a bit, so I just trimmed it down.

Skylark paper and complements were tons of fun to use! I think there will be more Skylark in my future.

Now, hop on over to Betsy's blog, Stamp Scrap Fever, to see what she has created. I'm sure you'll be inspired!

Saturday, February 1, 2014

A Lovely Easter on Ivy Lane with the Paper Trail

Welcome to the first Paper Trail blog hop of the new Spring/Summer Idea Book!  Whether you're arriving here from 
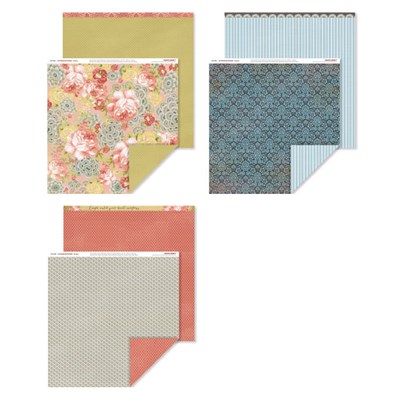
Amy's blog or this is your first stop, I know you're going to enjoy the elegant look and lovely colors of the Ivy Lane papers!

The combination of colors: Blush, Hollyhock, Ivy Lane Green and Ivy Lane purple, together with
the flower motifs reminded me of spring, so I turned to Easter photos. I used pattern from Make it Your Heart Vol. 2. I love starting with a pattern like this one - and then changing it to fit my layout.

Here's a closer look at the left page. I love the way the yellow of the chick pops against the colors of the paper.  The pattern included three photos on the strip, but I only had two. I cut the pieces the same size and then used the remaining space for my title.


Tip: Use patterns as a starting point, then change them to fit with the photos and products you want to use!

And, here is the right page. 

I used fancy embellishments to emphasize the elegant paper even though my photos were a bit more playful. In each embellishment cluster, I included a Cricut cut rosette, a butterfly and pearls.


I created the title using Cricut Artbooking cartridge and one of the coordinating stamp sets - Sweet and Lovely.

Thanks so much for stopping by! Come on back later this week to see more projects made with new products! For now, hop on over to Karen's blog. I'm sure you'll like what you see!