Pages

Showing posts with label Retired papers. Show all posts

Wednesday, May 28, 2014

Challenge Week - Let's Get Sketchy

I'm challenging myself this month and completing some challenges along the way.

Today's layout was inspired by this sketch from  Let's Get Sketchy.

Here is the layout I created:


I used a CTMH May special paper pack from two years ago to create this page. I also dug into my older embellishments to add a bit more pizazz.


The title, I promise, sums up the story. We were at the park for a fun day. I don't remember the special occasion now. Both kids decided to have their faces painted. They were very excited at the time, although I didn't capture that in these photos. Still, I promise, they were having fun!

Thanks for the challenge! Check back later in the week to see what other challenges I've taken on this month!

Thursday, May 15, 2014

Throwback Thursday: Everyday Thoughts

I challenged myself recently to use one of the first Close to my Heart stamps I every purchased. The set was Rustic Flowers. I bought it at the first CTMH party I ever attended in 2007, and it is still in my collection. I used it to make the background paper on this layout about my everyday routines.


Since it is a layout about things I do daily, I used my go-to colors - Outdoor Denim and Bamboo - as well as a pop of Smoothie for contrast. I wanted to explain the daily significance of the photos, so I tucked journaling tags in behind each. 


I added interest to the Outdoor Denim cardstock using the dots embossing folder and rounded out the embellishments with some brads and word stamps.


Challenge to myself complete - I used Rustic Flowers, and I documented a bit of my daily routine right now.

Do you have a tool from your first party, crop, scrapbook night? Do you have soemthing in your stash from 2007? Why not use it on your next layout?

Sunday, April 27, 2014

Play

My school spring break is just finishing up. I took some time to play this week and one thing I created was a layout based on sketch challenge at Scrapping Everyday Miracles this month. Here is the sketch:


And here is my layout, called Play:


I chose to use two very similar photos instead of just one to show more of what all three kids were doing as they played.


I used a playful font for my stamped title, and embellished with velvet-textured rub ons.


I really liked that the journaling wrapped around the circular element in the sketch. I added a journaling block but kept the wrap-around feeling with the punch out.


Thanks for the challenge! It was fun to play with!

Monday, January 13, 2014

For the love of Coffee

This fall I ended up at a crop planning to work on Christmas layouts. I had Christmas papers, Christmas stamps, Sparkle and Shine washi tape. I was ready. Except I forgot my photos. I was at a loss. I had half a day of scrapping ahead of me, and I had no idea what I was going to do. Enter the photo-less layout. I know that these don't fit with everyone's style. They don't bother me because the primary focus of my scrapping is telling the story. If I have a story with no photos, I still tell it! This one certainly fit the bill for me that day.


I have been saving paper coffee sleeves for some time. There is some paper hoarder part of me that wants to keep them. Two on this page are from special coffee dates. The third I cut apart for the perfectly shaped title block.

Since this was a layout about the story, with no photos, I wanted the journaling to be the major focus of the page. The long journaling block on the right  balances the three coffee sleeves on the left.


In addition to my coffee memorabilia, I used three different retired CTMH papers on this page. Can you name any of them? The first commenter to correctly name any of the three paper packs will get a prize!


Sunday, May 12, 2013

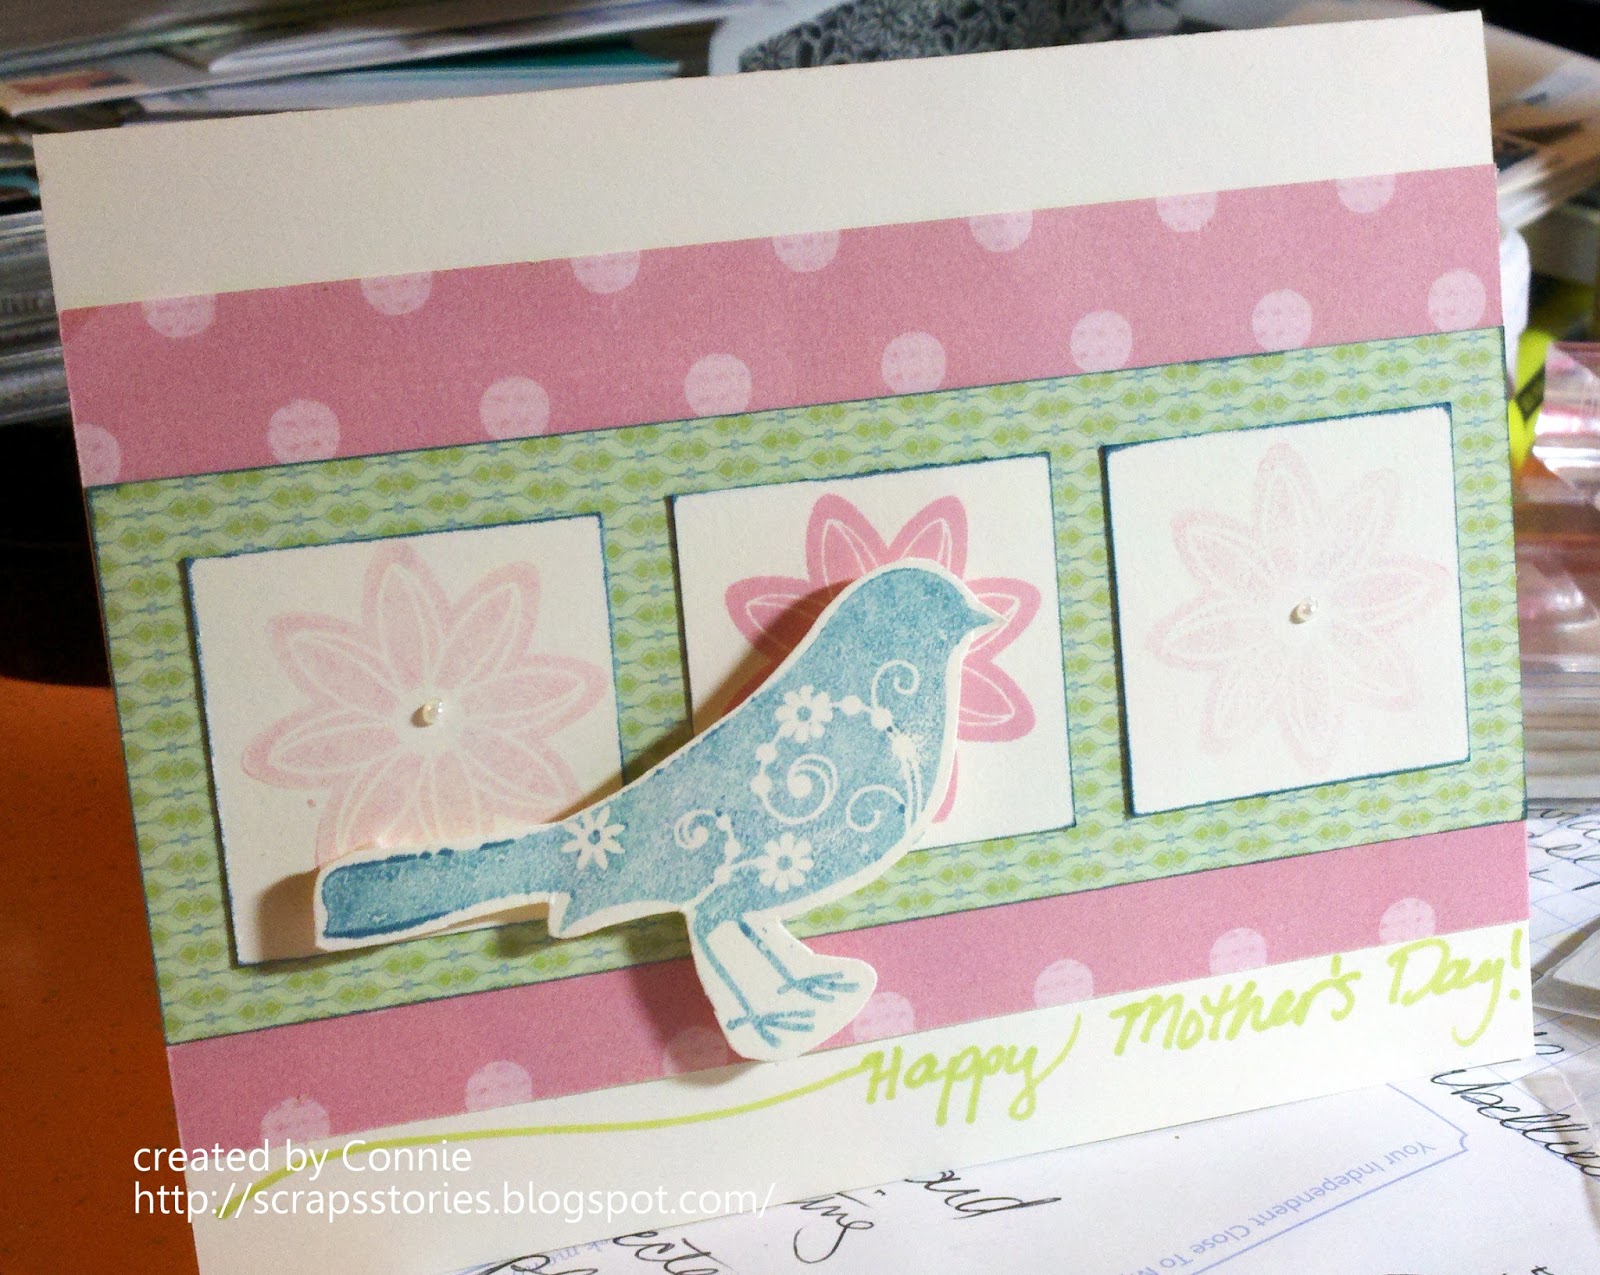
A couple of cards to say...

Happy Mother's Day!


Both cards were made using CTMH paper from one of my many scrap bags and retired stamps. Can you name any of the paper packets featured here? I'll give you a hint, the green pattern on the second card is from a current pack, that is the only one!

Hope your day was great!

Friday, April 19, 2013

Ten Pages in Ten Days - Part 1

I had spring break from my day job a few weeks ago, and I used much of my time to create. In fact when the dust had settled at the end of the break I discovered that I had created ten pages in ten days. (I was especially proud of this spurt of crafting since we were also doing other spring break activities like day trips and play dates as a family.)

Now school is back in full swing and my latest round of grades are submitted so I have time to share some of the pages I created. (A few are being saved for later reveal dates.) So, without further ado, the first of the ten pages in ten days:


Here are some details:

The paper and embellishments are a mix of older items from a couple of different companies.


I love creating layouts about these kind of everyday topics. This is one that I started long ago, but it has been languishing in my "to-be-finished" pages pile. (Do you have a stash like that?) I was finally inspired to finish when I had the right tools at my disposal and since I count pages when I finish them, it is one of the ten in ten!


Monday, March 18, 2013

A few two-page layouts

I've been posting many one page layouts recently. I know that I often get working on one idea - like single page layouts - and that is where I focus for a while. Sometimes, I give myself a challenge to do something different. Here are two two-page layouts from the last few weeks.

This one came together like a dream once I reminded myself to think in colors not just in themes. The greens and aquas of Avonlea were great for my dusky outdoor pictures.


A close up of the left side. I kept the design simple to let the photos shine. Some foam adhesive and Colonial White Waxy Flax were my only embellishments.


And the right.
I stamped the title with the Bohemian Alphabet and stamped a simple border at the top of the page.


This second layout uses some older and some very new products. I based my design on pattern #2 from Make it From Your Heart (new). The papers are long-retired (old).


The left page.
I really like the way the pigment ink makes the title pop even stamped across three different colors. (new) The alphabet stamp set is Cobblestone - retired (old)


The right page.
The pattern papers are from two different packs - Level 1 kits, in fact (remember those?) I liked the way they fit with the outdoor feel of the page. (Definitely old)
Some details:


I paired the older papers with some newer embellishments including the Epoxy Bubbles and a quote from a new set. (definitely new!)


There. I've taken my own challenge and have proven to myself that I can still create in 12X24. What's next? Maybe 12X18?

What about you? What is your go-to size for layouts?


Tuesday, February 26, 2013

I've had some creative time...

One of the things I love about my day job is that I have vacations every so often. Last week was one such vacation. We didn't take any major trips, didn't plan any big events. This time we simply stayed around town and enjoyed a more flexible schedule. For me, that meant a good deal of creative time. I think I have completed 14 pages this month.

Here are a couple of pages from the last week or two. I've found some summer photos from a last year. It is a nice change from the weather we are having here right now.

Although these photos aren't obviously from July 4th, I decided to take my cue for the color scheme and journaling from the holiday I know we were celebrating. (Our most patriotic tradition is watching fireworks, and I haven't yet tried photographing them.)

 I used mostly cardstock on this page. (Only the base page is patterned paper.) I did stamp a background on the red (Ruby) paper and some details on the kraft.

When I was almost done with the layout, there was an unplanned change. Can you see where I dropped my ink pad directly on the kraft cardstock? I ended up distressing more than I had intended, but I'm okay with it.

The journaling I did doesn't focus specifically on this day or on our July 4th traditions. I've already created that layout. Instead, I wrote a bit about my feelings for my country and my hopes for my kiddos in that regard. I don't think I've ever journaled about that before.

The next page was totally photo driven. One day last summer I decided to get artsy with the camera at dinner time. I have been sorting out some old supplies recently. All three of these papers came from my "old supply" stash. Two of them are older than my three-year-old!


Flexible time, fun summer photos and supplies I forgot I had. For me last week, this was the recipe for creativity!

What has been inspiring your creativity lately?

Saturday, February 23, 2013

Showering You...

Nothing gets me going like someone issuing a challenge. I love them! I especially love sketch challenges. I am excited that I had time to play along with two different sketch challenge blogs this month. I created two one-page layouts that will go side-by-side in my album as a larger spread about an event. I've been doing this frequently this year - creating two one-page layouts that work together to tell one story. 

The first sketch I used was from Stuck?! Sketches. Isn't it fun?


 I usually scrap 12X12, so I modified the sketch a bit. Here is my take:


I used some very old paper from CTMH (Precious Paisley). I thought it was perfect for a baby shower! I liked the circle included in the sketch behind the photos, but it didn't work with my photos. Instead I used three small circle stickers and some sparkles to add interest to the linear design of the layout.

The second page I created based on a sketch at Sketches in Thyme:


The page I created is a companion to the page above and uses many of the same products.


I didn't feel the need to include a title on this page since the journaling, photos and products link it closely to the page above. The photos I used were too large to be lined up across the layout. I am pleased with the way this cluster of photos contrasts with the more linear page above.


I'm finding this idea of creating companion one-page layouts is really working for me. I get the benefits of both types of designing - the smaller canvas of the 12X12 but the simplified product choice of the 12X24. The variety of sketches available in 12X12 but the ability to tell a story of 12X24.

What about you? Do you know any good challenge blogs? Have you discovered any tricks that are really working for you right now? I would love to hear from you!

Thursday, February 21, 2013

Cousin Layouts

In addition to the layouts I posted last week, I created a few about my darling nieces in January.
My brother's darling Abby meeting her Great Grandma:


This uses CTMH's La Belle Vie paper packet - now sadly retired. (The tag with the heart and the frame with the flower were a make and take at the January Crop N Time event.)

I used some retired stamps, a bit of black tulle ribbon and washi tape to embellish. This tulle gives a lot of bang for the buck. The pieces on this layout are 1/4 of the full width!


Another layout using La Belle Vie. This time I used the negative space from the hearts I cut for the make and take to create the background of a layout documenting my niece Olivia's baptism:


The negative space was fun to play with. I tried many colors behind it, and settled on the pink pattern and Colonial White.

I added some stamped and fussy-cut flowers from Hooray Bouquet with clear sparkles to embellish.


I also pulled out some more retired stamps to create the borders and the title.


And finally, a layout that actually includes cousins! Near the end of the day at the January crop I wanted to continue creating, but my table was a mess. I decided to try to use the things on my table to create another page. I found two photos of my little guy with his cousin and this was the result:


I loved the bright colors of the play mat with the papers and embellishments. The supplies are a mish-mash of manufacturers. Almost all of the CTMH materials are long retired.

I'm glad to get these girls into my scrapbooks! What have you been creating about your family lately?

Monday, January 14, 2013

First Layout of 2013

Here it is! My first layout completed this year.

My school photo from this year seemed to fit with this paper pack - the long retired Grace from CTMH. The papers and Stickease were perfect, and it was easy to use so many coordinating products.


I've been making layouts like this one for a few years now, but it still surprises me how cathartic the process can be. While creating this one I:
  • reviewed some of what I accomplished last year 
  • got my hands into paper (and cutters and tape runners) for no purpose other than my own pleasure
  • used papers and embellishments that I have loved literally for years but have been saving for some "perfect" project
  • admitted some things about the way I follow through on goals
  • forgave myself for the same things I had just admitted
  • remembered that I have to complete this layout before I feel ready to complete one about goals for 2013
  • recorded most of that so that hopefully I will remember to do it again next year!
For me it was surely time well spent.

I started the layout with the layered base papers and photo. Then I went to the Stickease for help with a title. I loved the look of this frame, but the words inside didn't fit. I had planned my layout around the "in review" theme so I knew I wanted that title. I added the letter stickers over the majority of the title on the frame, but I didn't have enough space for my whole two-word title. To cover the remaining portions of the frame I cut into the patterned backing paper between the Stickease stickers. The background pattern is the same as that of the letters, so once I found sections that were big enough to cover the underlying text, I simply cut them into the appropriate shapes and then added them to the frame and wrote in my text! Notice the small yellow flower next to the word "in" in the title? The scrap of sticker paper had the corner cut out, but the flower was an easy fix! 


After I had the photo and title in place, I added the journaling. I got a bit creative with all of the different portions of my journaling since reflecting left me with so much to say. Finally it was time to embellish. I filled in many of the spaces with stickers from the Stickease sheet.


One of my traditional January layouts done. Keep your eyes open for the other - a layout about goals for the coming months.

What about you? Do you complete any pages at the end of one year or the start of another? How do you record goals or resolutions you set?

Friday, August 10, 2012

Note to Self: Remember - Challenge Me Happy #27 and DT call

Have you seen the current challenge at Challenge Me Happy? Its a recipe challenge - one of my favorite kinds. It is also a design team call! 
I had fun with this challenge which was to include:
  • one or more stamps -  Easy for me. I stamp on most of my layouts.
  • two photos - No big deal. I'll make a one page layout.
  • ribbon or twine or both - Again, no big deal. I love twine!
  • two or more paperclips - Out of the ordinary for me, but I think I have some fun paper clips.
  • no card stock - Now this is a challenge!
  • three patterned papers or more - Three or more? Yup, another challenge.
Here is the layout I created recording memories of Garden of the Gods - a favorite place to visit in college:


Checking the recipe:
Two photos - check
Three or more patterned papers - check  (All of the papers are CTMH. Most are from retired paper packets). 
No card stock - check


Two or more stamps - check. The title is made up of two different stamps. The chevron pattern is stamped and the sentiments on the top right corner of the plaid paper are stamps.
Twine - check. 
Three paper clips - check. 


I included some hidden journaling behind the photos. I modified the die cut journaling card to make it a perfect fit for this layout. Originally it had plain colored twine but I swapped it out for the same chocolate twine I used in other places on the page. I also added the stamped sentiment that peaks out from behind the photo.

Thanks, Challenge Me Happy for inspiring me to create this layout!

Thursday, June 7, 2012

Project #2 - Name Banner

I've been working away on my projects but not posting because many are gifts. I want to be sure that the recipients see the gifts first in real life not here in photos. My darling niece has received her banner, so now I can share it here.


The chipboard banner is from CTMH, and I used the Art Philosophy Cricut Cartridge to cut the paper into the appropriate shapes. The Cricut cut pieces matched perfectly with the banner and made my job much easier. I chose the paper I did because my niece's room is decorated in pinks and browns. This paper is More to Adore - long retired from CTMH. It is actually the first I bought from CTMH in 2007.


I cut each of the letters of Abby's name from patterned card stock and then adhered them with foam dots to the banner pieces.


I alternated between three types of embellishments - Chocolate twine, buttons and Opaques Mocha.


Since Abriella only has 8 letters, I chose to decorate the remaining two pieces to use as anchors at the end. Again, I used Cricut cut shapes and the same embellishments.


I added the cute little bird specifically because I know that Abby's mama likes them!

I'm pretty happy with the way this project turned out.  I hope Abby enjoys it as well! This is also a perfect entry for The Paper Variety's current challenge - Anything but (a card or a layout.)

Two projects down, only 34 more to go!