Another day, another challenge. I love having time to create pages and share them! This is the current color challenge over at Color Me Scrappy. The twist was to highlight food in some way.
There is a story I've been meaning to tell for almost two years now about my daughter and cookbooks and it seemed to fit the bill.
*Note: The winter daylight here has distorted the colors of my layout a bit. In person they look much more like the challenge colors, really!
In addition to recording a story and participating in a challenge, I got the chance to use my new Cricut Expression 2 and the CMTH Artbooking cartridge. In fact, I used only cardstock on this layout!
I am so glad I finally recorded this story. Thanks for the challenge and the inspiration!
Monday, December 30, 2013
Sunday, December 29, 2013
A little Sparkle and Shine
Sparkle and Shine - I love this paper pack! I'm sad it's only available through the end
of this month (12/31 that is!) I am not ready to say goodbye to Christmas yet, and I have more Christmas photos to
scrapbook. I may have to order another pack in the next two days.
This is the layout my club created in December.
Did you notice the fun ornaments on the page? I used the Trim the Tree stamp set and also the Sparkle Holiday Shapes also from the holiday gift guide. I love the way the Cricut cut ornaments get added pop from the sparkle.
Remember, all of the products from the holiday gift guide are only available through December 31. Shop my site or contact me to get your own before then!
Saturday, December 28, 2013
I am a teacher
This sketch worked perfectly with my current school photo to tell a story that occurred to me while doing holiday baking with my kids.
The journaling reads: I am a teacher in the classroom - but also in the kitchen, craftroom, grocery story. Teaching is part of who I am; it is how I approach others and the world.
For me scrapbooking is, at its heart, about recording stories. Although this journaling is brief, it captures an integral part of my personality, something I need to be reminded of and that I hope my kids will remember as well.
This layout seemed to come together on its own. I had some pieces that I had cut while playing with CTMH's Artbooking Cricut cartridge in the fall. They seemed to fit well with the story I discovered while baking. A school picture was just the right evidence for the story. Thanks, Stuck?!, for the sketch that provided a perfect canvas for this layout!
Sunday, December 1, 2013
There is a Proplayer on the Paper Trail!
Welcome to the Paper Trail blog hop! This month we're hopping along with Proplayer. If you've arrived here from Linda's blog, you're on the right track. If this is your first stop, don't worry - our hop is circular!
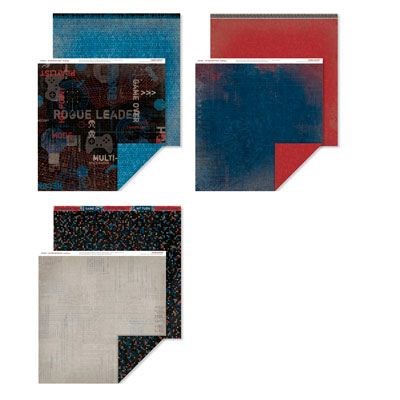
I love the colors of this paper! Ruby and Pacifica are such vibrant colors and they are fun to work with! I have to confess, however, my kids are young and therefore aren't really into video games. I wasn't sure how these papers would work for me, but when I started creating, I loved what I came up with!
I apologize in advance for the quality of my photos. Hopefully the sun will be out tomorrow and I'll be able to share new ones.
The colors of this paper were perfect for some photos of kids at play -both with the clothes and the playground. When I used the patterns in small bits, I found that they seemed more geometric and less game specific. I used embellishments from the Proplayer assortment, Slate Polka Dot Washi Tape, a frame from Dimensional Elements Snapshots and arrow stamps. I liked the way the circular embellishments mimicked the patterns in the paper and the arrows focused attention on the important parts of the page as well as showing movement - as the photos of the kids do!
I decided to emphasize the geometric nature of the patterns again in this layout. (It is nice that the people I photograph wear so much blue!) Notice, I used round embellishments - here it was Durables Round Studs - and arrows - here made from the Ruby paper - just as I did in the previous layout. The materials and theme were largely the same. This is one of my biggest tips in scrapbooking - when you find something that works, use it and use it again!
Thanks so much for stopping by. I hope you'll be back in the next few weeks to see some more fun projects. Now head over to Amy's blog to see what she has created - she is a pro, you know!
I love the colors of this paper! Ruby and Pacifica are such vibrant colors and they are fun to work with! I have to confess, however, my kids are young and therefore aren't really into video games. I wasn't sure how these papers would work for me, but when I started creating, I loved what I came up with!
I apologize in advance for the quality of my photos. Hopefully the sun will be out tomorrow and I'll be able to share new ones.
I decided to emphasize the geometric nature of the patterns again in this layout. (It is nice that the people I photograph wear so much blue!) Notice, I used round embellishments - here it was Durables Round Studs - and arrows - here made from the Ruby paper - just as I did in the previous layout. The materials and theme were largely the same. This is one of my biggest tips in scrapbooking - when you find something that works, use it and use it again!
Thanks so much for stopping by. I hope you'll be back in the next few weeks to see some more fun projects. Now head over to Amy's blog to see what she has created - she is a pro, you know!
Friday, November 1, 2013
Frosted on the Paper Trail
Oh, the weather outside is frightful, but the fire is so delightful...
I taught a couple of Christmas card workshops using this paper during this fall. Here are some we made.
On this card I used the Single Snowflake stamp to embellish the card base and then used two sides of the same B&T. The sentiment is from Glory to God (a set you'll see more of here later this week.)
On this card I added in some neutrals using Bamboo cardstock and Cashmere Ink. The stamps are from Scandinavian Wishes, the October stamp of the month. I also added a bit of bling - the star from the Sparkle Holiday Shapes.
When the card workshops were over, I had leftover pieces. I couldn't just throw away that beautiful paper, so I created this layout. I added Twilight and Colonial White cardstock behind the B&T paper and then Startdust Glitz Glitter Gel on top. I think the added sparkle is just the right thing for this paper!
Thanks for stopping by! Check back next week to see more artwork using the Glory to God stamp set. Until then, hop on over to Betsy's blog to see what she's created!
Are you singing yet? Although the weather here isn't quite frosty yet, Frosted is here on the Paper Trail! If you've arrived here from Karen's blog you're on the right trail. If not, don't worry. Our hop is circular!
I taught a couple of Christmas card workshops using this paper during this fall. Here are some we made.
On this card I used the Single Snowflake stamp to embellish the card base and then used two sides of the same B&T. The sentiment is from Glory to God (a set you'll see more of here later this week.)
On this card I added in some neutrals using Bamboo cardstock and Cashmere Ink. The stamps are from Scandinavian Wishes, the October stamp of the month. I also added a bit of bling - the star from the Sparkle Holiday Shapes.
When the card workshops were over, I had leftover pieces. I couldn't just throw away that beautiful paper, so I created this layout. I added Twilight and Colonial White cardstock behind the B&T paper and then Startdust Glitz Glitter Gel on top. I think the added sparkle is just the right thing for this paper!
Thanks for stopping by! Check back next week to see more artwork using the Glory to God stamp set. Until then, hop on over to Betsy's blog to see what she's created!
Tuesday, October 1, 2013
Babycakes and a Dragon
Welcome! If you've arrived here from Linda's blog, you're on the right track. If this is your first stop, welcome to the Paper Trail blog hop! This month we are featuring the Babycakes paper packet. Don't let the name fool you, though. This paper packet is fun and versatile!
The alphabet paper inspired me to create this layout featuring my daughter and a story she wrote:
In addition to Babycakes, this layout features a Flip Flap from the large assortment to protect my daughter's original story. This way, you can read the story in its entirety.
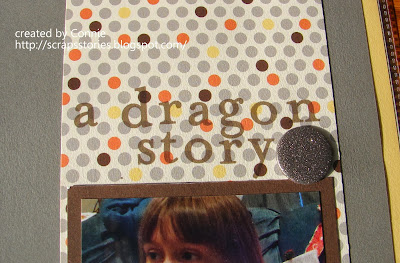
I stamped my title directly on the polka dot pattern paper. I like the way the Chocolate Ink looks on this paper, but if you want a darker shade using dye ink you can always double stamp - stamp your image once then re-ink the stamp and stamp again in the same spot. This technique gives a bolder version of the same color.
The heart stamp (as well as the stamp near the top of the journaling) is from the Workshop on the Go kit. I love that each workshop includes an exclusive stamp set because stamps are reusable! Often the stamp sets are what inspire me to purchase the workshop kits.
This kit also included the bronze shimmer trip I used to embellish. I have to confess, this was the first time I used the shimmer trim. I was impressed! What a fun and easy way to add a bit of sparkle to a project!
The shimmer trim also inspired me to pull out these retired (read "been in my stash for years") glittery brads. I thought they did a nice job of tying together the sparkle and the circles.
The alphabet paper inspired me to create this layout featuring my daughter and a story she wrote:
In addition to Babycakes, this layout features a Flip Flap from the large assortment to protect my daughter's original story. This way, you can read the story in its entirety.
The page beneath the Flip Flap gave me a spot to record my thoughts on her writing, without competing with it for space on the page.
I stamped my title directly on the polka dot pattern paper. I like the way the Chocolate Ink looks on this paper, but if you want a darker shade using dye ink you can always double stamp - stamp your image once then re-ink the stamp and stamp again in the same spot. This technique gives a bolder version of the same color.
The heart stamp (as well as the stamp near the top of the journaling) is from the Workshop on the Go kit. I love that each workshop includes an exclusive stamp set because stamps are reusable! Often the stamp sets are what inspire me to purchase the workshop kits.
This kit also included the bronze shimmer trip I used to embellish. I have to confess, this was the first time I used the shimmer trim. I was impressed! What a fun and easy way to add a bit of sparkle to a project!
Thanks so much for stopping by. I hope you'll be back on the weekend to check out some more projects. Until then, hop on over to Amy's blog. I know you'll be impressed with her "baby"!
Monday, September 16, 2013
Subway Tidings: Check out this Stamp of the Month!
I loved this stamp of the month from the moment I saw it! There are so many possibilities! We're doing a make and take with it this Saturday at Crop N Time, why not check out the video and then join us at Crop N Time to check out the stamp. If Saturday doesn't work for you, you can get this stamp through my online store!
Wednesday, September 4, 2013
Tuesday, September 3, 2013
Try it on
One of my favorite parts of scrapbooking is creating with people. I love seeing what other people are working on - what colors they are using, what designs, what embellishments and how it all comes together. I also love getting inspiration from the projects other people are working on. I've been creating a lot this summer, but much of it has been on my own. When I hosted a layout class a few weeks ago, in addition to showing the techniques I was planning to teach, I was totally inspired by the pages the other ladies created. After they had gone, I gathered the extra supplies and created this layout:
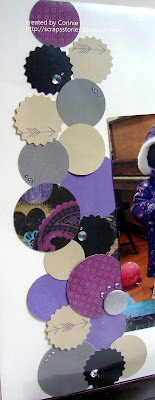
I started by arranging the circles in a rough vertical line near the left hand side of the page. I worked only with the circles that were already cut and played around with them until I was happy with the arrangement. (I did count so that I included three of each type of circle.)
I struggled with the design beyond the vertical line of circles. I had three photos I wanted to include as well as the journaling to tell the story. I couldn't make all of those pieces fit in a way that made me happy. There just wasn't enough space on the page - so I added a flip flap. The extra space gave me enough room for the third photo and the journaling.
I finished the layout with some stamping and some sparkles.
Thanks for the inspiration, ladies! This one will win approval even from my fashion conscious little one!
Sunday, September 1, 2013
Life is Sweet on the Paper Trail with Huntington
Thanks so much for stopping by! This month on the paper trail we are hopping along with Huntington. If you've arrived here from Mary's blog you are on the right trail, but don't worry, this is a circular hop so just start here!
I love the vibrant fall colors in this paper packet. I especially loved the exclusive stamp set featured with the workshop on the go.
I stayed very close to the pattern found in the workshop guide only changing the size of the photos and the journaling block.
I loved the way the colors featured my fall hike photos without overshadowing them and the stamped title worked well!
The added dimension of the foam adhesive and multiple color stamping worked well with the stamps that already give the appearance of dimension.
Here is the left page:
And here is the right:
Life is sweet with workshops on the go! It was easy to combine the elements of the kit to create this fun layout. The best part is that I still have more paper and embellishments - and of course the stamp set. I will certainly be making more fall layouts with this kit! In the meantime, please continue on to Linda's blog to see what she created. I'm sure you'll fall for her project, too!
Saturday, August 31, 2013
I believe...in challenges - two of them!
What do I believe? That seemed like a heavy question to deal with in the summer - a time I associate with light-hearted fun. Still, I love a challenge. When I saw the word "believe" at Use Your Words, I decided to play along. As I started thinking about this layout, I remembered something that I have said to my kids many times - so many times that they now repeat it to me:
I found a fun photo of my two kids and me and then I found this sketch at Let's Get Sketchy
And it clicked.
I kept the embellishments simple using chipboard and coordinating ink.
Thanks for the challenges!
Monday, August 26, 2013
Joy - Two layouts for Two different challenges
The August 5th challenge at Stuck?! was not like that. I liked the sketch and thought I could work with it, but it was the extra challenge of a quote by Abraham Lincoln that sucked me in. "And in the end, it's not the years in your life that count. It's the life in your years." I read the quote and knew that I was going to create a layout for this challenge.
I have already created a layout about the day on the bounce pillow. I've told that story. Still, this photo drew me in. I can see the life in my daughter's face. It seemed perfect with Lincoln's quote.
As I created the layout, the word that was constantly on my mind was joy. Joy is what I can see in her eyes. So I decided to add another quote (this one by Wagner) and use the word "joy" as my title.
I included the Lincoln quote on a journaling tag to cover some distracting images in thebackground of the photo. I used the "m" monogram for my daughter's name.
And last but not least, some joyful embellishments for the page. (These pinwheels are fun and easy!)
The first joy layout, the first challenge.
It was such fun creating a layout about my daughter's joy, when I found this joy-filled photo of my son from the same summer, I was inspired to do a layout with a similar theme.
This one is based on the August 1 sketch at Let's Get Sketchy:
The background strips caught my attention immediately. (Especially since I had been cleaning off my desk and discovered many long and narrow scraps of paper.) I used blue and green paper to bring out the colors in the photo rather than compete with it since I was using lots of different pattern papers.
I chose the same title, but for this one I paraphrased the Wagner quote as my journaling to include some of the things that my son finds joyful.
I decided to include a monogram as I had on the first layout (even from the same set of Thickers) and stamped onto chipboard stars for a bit more whimsy.
Creating two layouts that were thematically connected was a new challenge for me. I'm glad I've captured the joy of both of my kiddos in the summer of 2011. Thanks for the challenges, Stuck?! and Let's Get Sketchy! These two layouts were a joy to create!
Wednesday, August 14, 2013
On the Porch at Home
I loved the photo block balanced by the grid design with pattern paper and embellishments. I used an old special paper pack - Dotty for You.
I used the tag for both title and journaling - again, because there was so much going on elsewhere on the page. It did occur to me when I had the page all laid out that I had included bright white cardstock and an off white tag, but I decided I liked the tag enough to include it anyway.
That is how the an idea book inspired me. What is inspiring you lately?
Thursday, August 8, 2013
More fun with Laughing Lola
I love playing with new papers, and Laughing Lola is one of my favorites! I created a blank one page layout as a prize for my recent new catalog open house. This layout is based on one page of a two page design featured in Make it From Your Heart Volume 2.
Creating a blank layout poses different challenges to me. I enjoy trying to keep it interesting and fun without getting too specific or themed. I find working with photo spots instead of actual photos can be a relief. I always wonder if there will be enough room for journaling, but I do have some hidden journaling tricks that I can use.
I used to be nervous about adding embellishments to blank layouts, but when I use a visual triangle I am happy with the results.
For this layout I decided to go with bling. I used clear sparkle flourishes, clear sparkles, floral accents, and teal jewels. The floral accents and teal jewels are featured in the wearable art section the new CTMH idea book, but they also work very well on layouts and cards. They are self adhesive and can give any project a bit of dimension and sparkle.
I hope the lucky lady who one this layout will be laughing, too!
Subscribe to:
Posts (Atom)